By Diane Harris, HQ Stitch Brand Ambassador
These little stars are so easy and so much fun to make. I get into my scrap bin and cut the patches regularly so that I can make them whenever I have a few minutes.
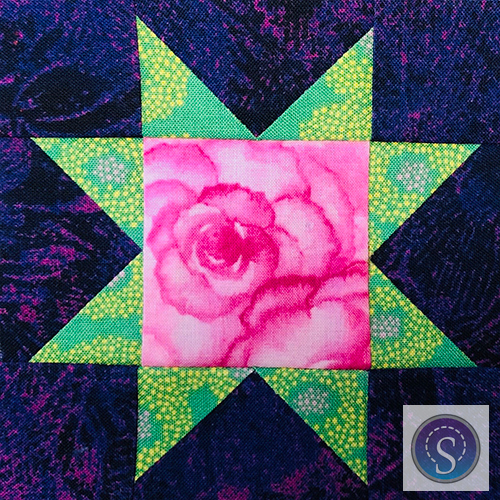
This block finishes at 4″ when sewn into a quilt. It will be 4-1/2″ x 4-1/2″ when you’re finished making it.
You’ll need two fabrics for the star. You can use a third fabric if you want the middle patch to be different.
I’m going to make the background dark and the star light. You want the background and star fabrics to contrast. In other words, you should be able to see a clear difference between them. One should be considerably darker or lighter than the other. If the fabrics are too similar in value, your star will disappear.
Cutting for 1 block
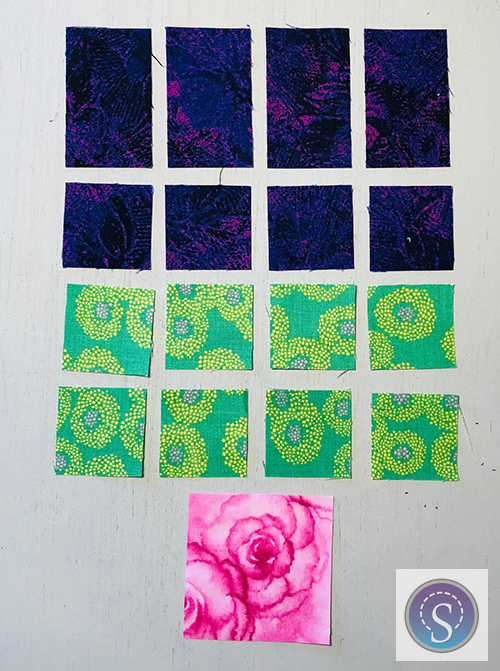
From the background fabric (shown purple), cut:
4 rectangles 1-1/2″ x 2-1/2″
4 squares 1-1/2″ x 1-1/2″
From the star fabric (shown green), cut:
8 squares 1-1/2″ x 1-1/2″
1 square 2-1/2″ x 2-1/2″ (shown pink, see option below)
Optional:
Use a different fabric for the center square; cut it 2-1/2″ x 2-1/2″.
Making the star
This block uses stitch-and-flip and leaves the base patches in place, uncut.
The four background squares and the center square will be sewn into the block just as they are.
You’ll be sewing across the green (star) squares diagonally, from corner to corner. On a patch this small, I can eyeball it, but feel free to mark the diagonal line if you want to.
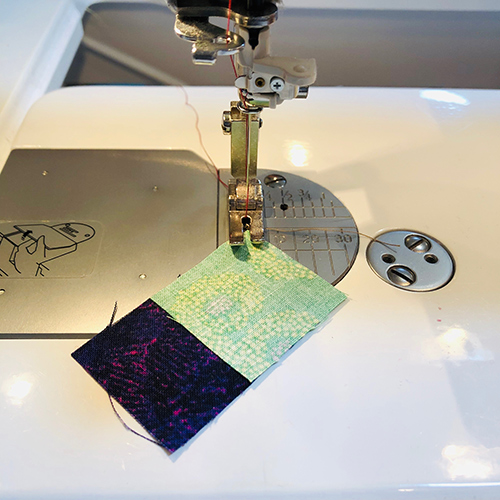
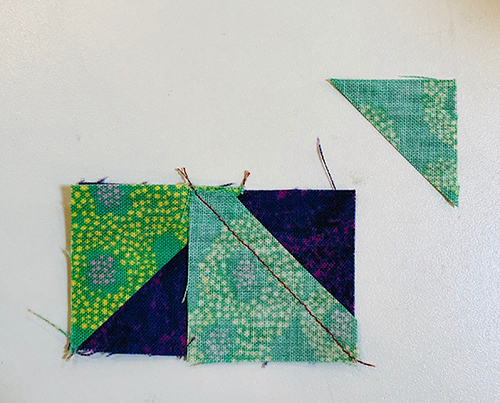
Place a star square right sides together with a background rectangle as shown. Sew diagonally across the square.
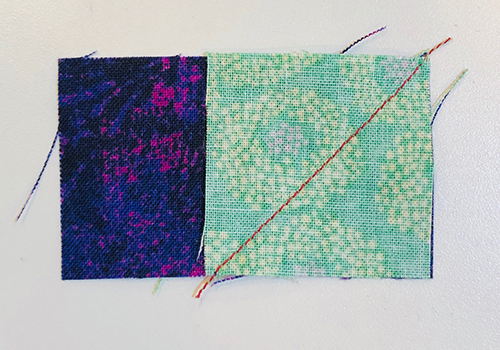
I used contrasting thread so you could see it. In reality, use a neutral thread like tan or medium gray.
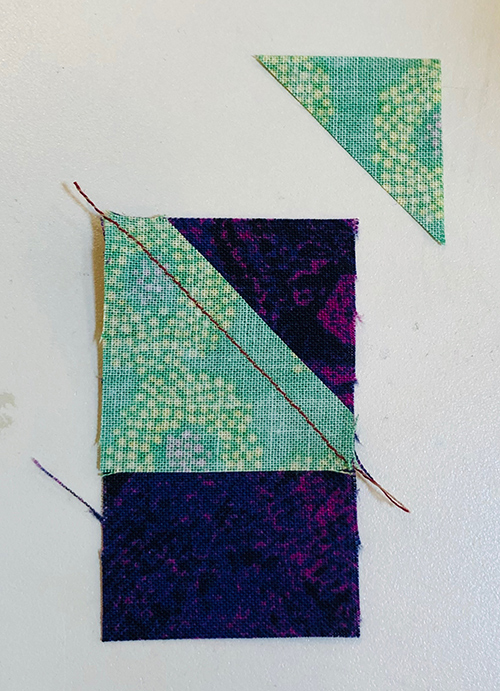
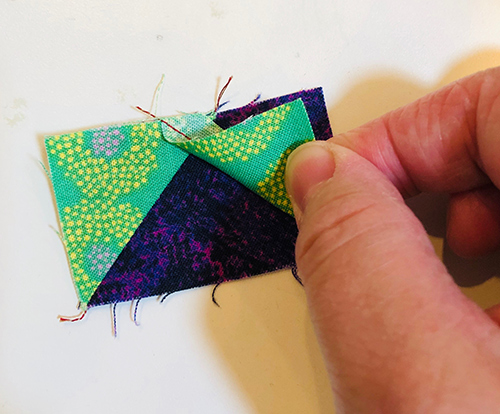
Trim away only the square (green) patch to leave about a 1/4″ seam allowance as shown above. Leave the entire background (purple) patch in place.
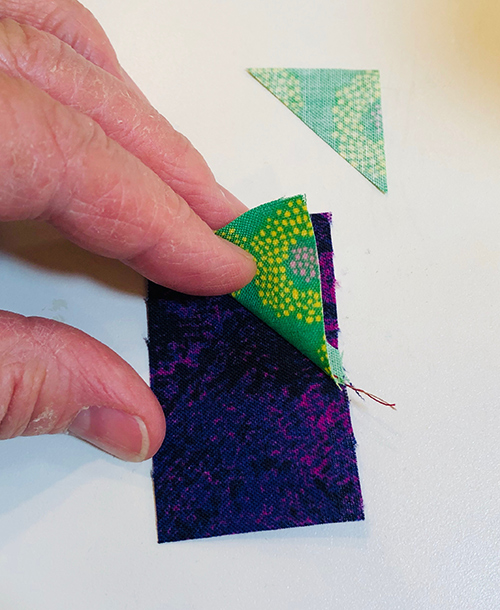
Flip the green patch to the right side and press. Repeat for the remaining rectangles and squares so you have a total of 4 units as shown below.
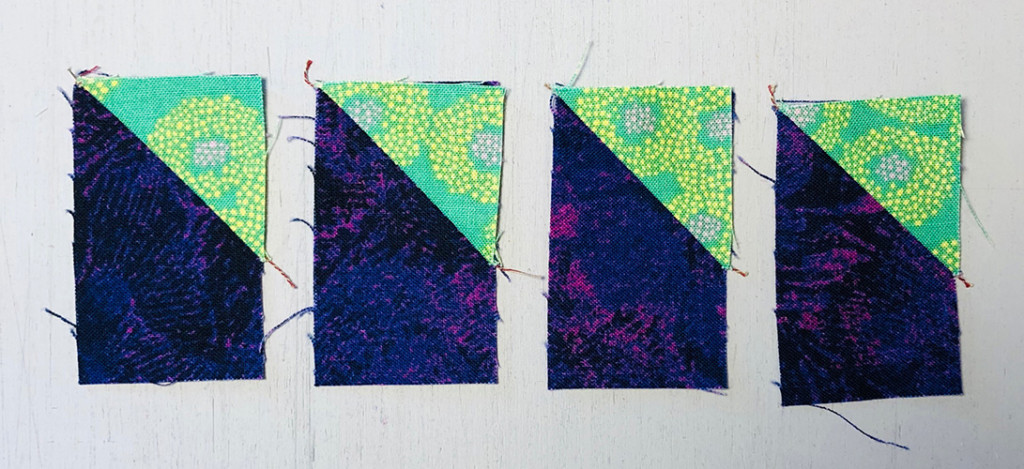
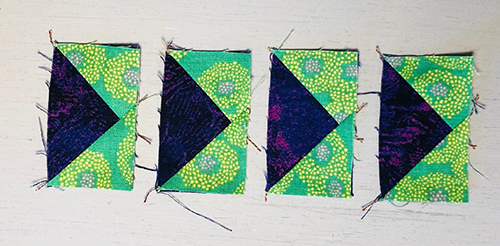
Repeat this process with the other 4 star squares, sewing in the opposite direction as shown below.
Trim as you did before.
Flip the patch open and press as you did before.
Make 4 of these units. They’ll become the star points.
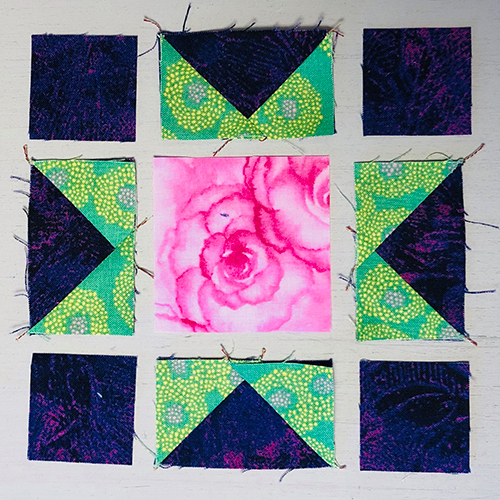
Arrange the patches as shown below.
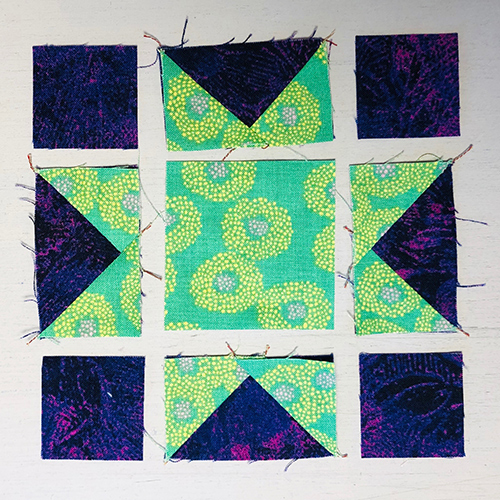
This is a good time to consider using a different fabric in the center.
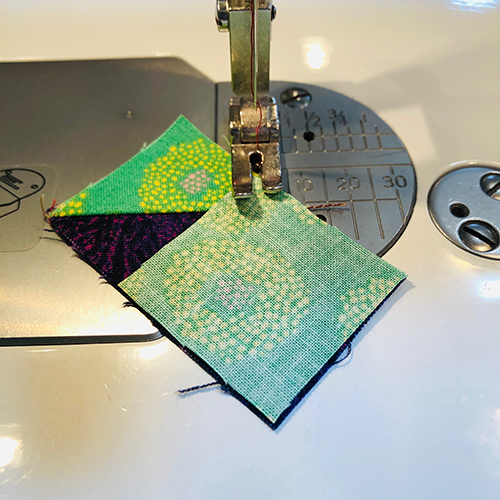
Join the patches in rows: top row, middle row and bottom row.
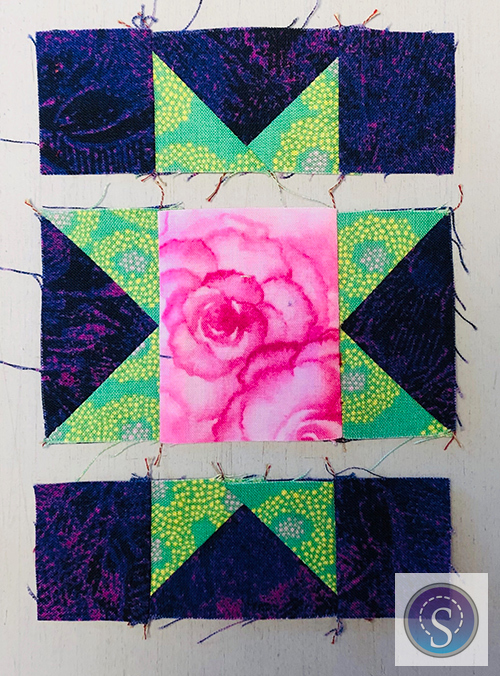
Press the seam allowances of the top and bottom rows outward. Press the seam allowance of the center unit inward, toward the center. Sew the rows together. Press the block.
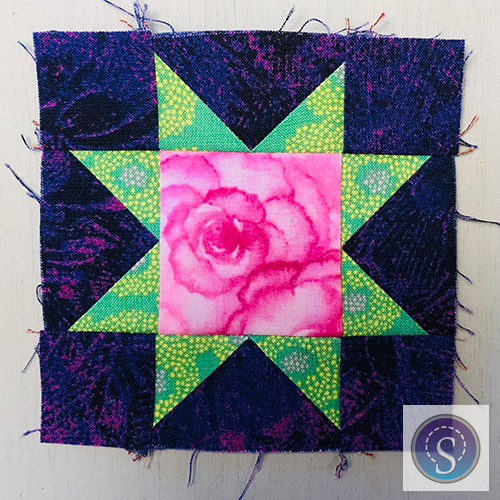
The block should be 4-1/2″ x 4-1/2″ including the seam allowances.
Variations and Going Scrappy
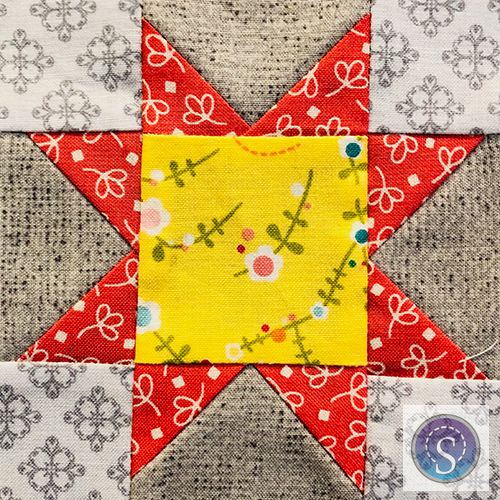
Once you get going, you can scrap it up! Here are some examples made from my scrap bins.
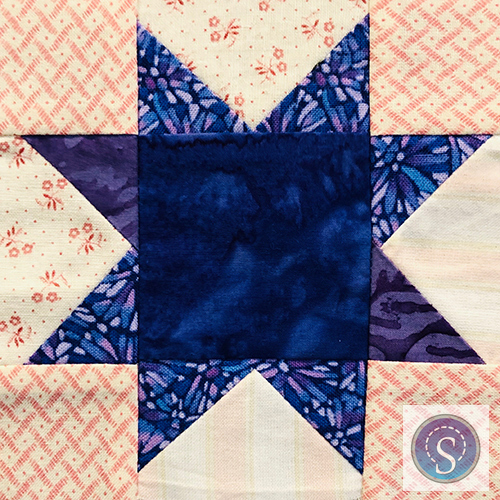
The backgrounds don’t all need to match. If they’re similar in value, they’ll read as one.
Here’s another example of scrappy backgrounds. The pinks are similar enough to work.
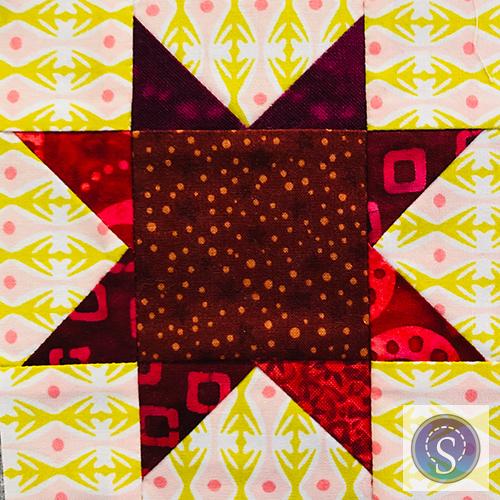
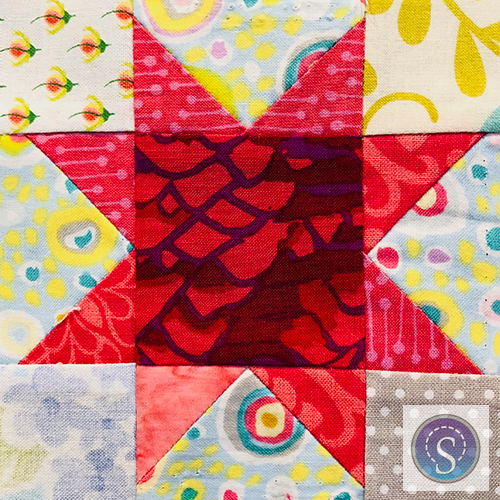
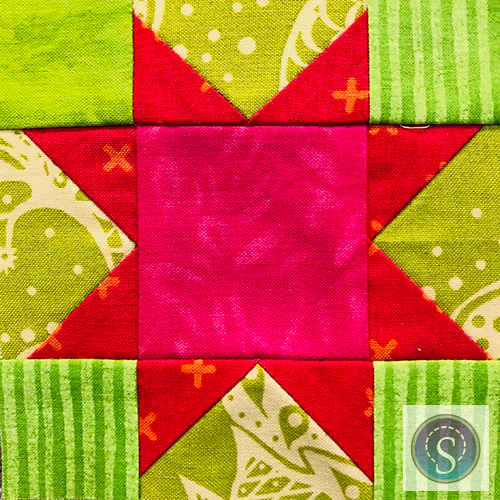
The star points don’t have to match either. There are four different fabrics for star points in the block above. Works just fine because they’re similar in value, which is just lightness or darkness. They also happen to be red, but that’s less important than the value.
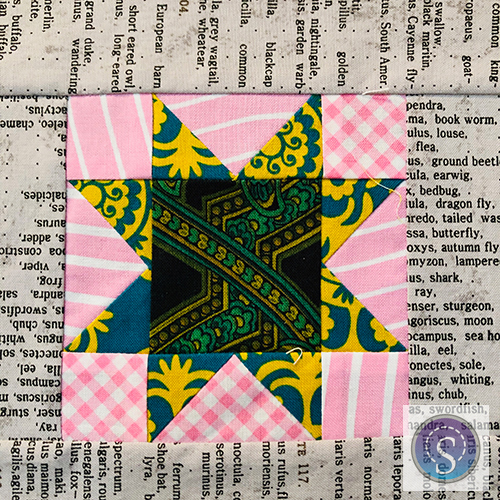
This block has scrappy points and a scrappy background. I count six fabrics in this one.
What is you don’t have quite enough fabric to cut all of the patches? Then substitute something similar as I did above. It will blend right into the quilt, and it’s a little extra surprise for those taking time to look closely.
More scrappy backgrounds, gray this time. One gray is more tan than the other, but that’s just fine.
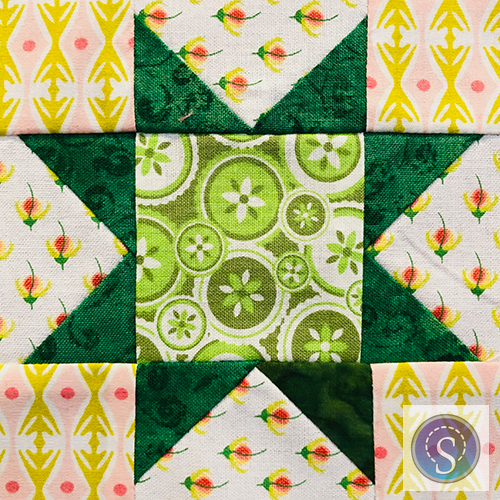
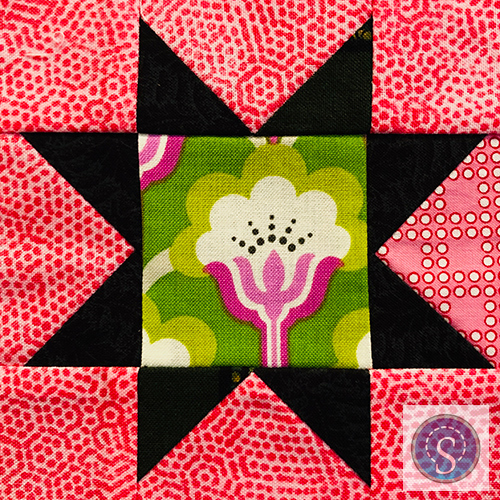
Making them scrappy holds my interest. It’s a challenge to see if I can find fabrics to make it work with what I’ve already cut. In the green star above, one point is a different fabric.
Same idea. I only had three striped green patches for corners. I substituted a mottled green for the top left.
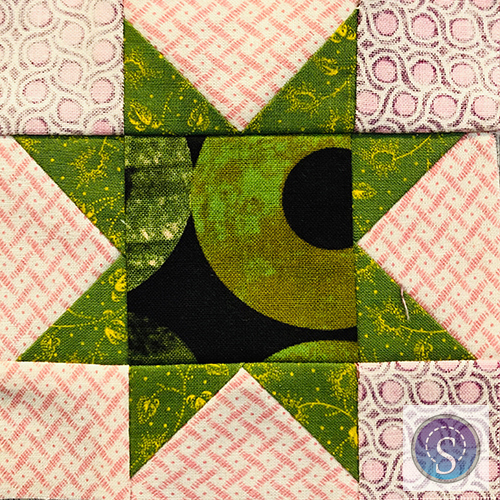
One of my best tricks is to use the wrong side of fabric in order to get the look I want. In the block above, three of the corners are fabric “face down.” This way they’re similar in value to the other background fabric.
Quick Video!
See a one-minute video of all my current stars!
I hope you’ll make some scrappy little stars. If you do, send me photos to share on social media: hqstitch@gmail.com.
Next up: Ideas for combining your wonky 6″ stars and these 4″ stars!
Love this! Hope we get to see what you ultimately do with all your little stars.
Thanks for permission to do these
Impromptu substitutions! Very freeing
I was all hung up about not having 4
Matching corners/points, but after your
examples I am a happy convert!!