Every so often I run into a piecing task with tricky intersections. They’re the places that cause problems if they’re not sewn accurately. My quilt of spools, thimbles and buttons for Quiltmaker magazine is a good example.

The piecing is not complex, but the intersections where the “thread” meets the wood in the spools is tricky. Unless it comes out just right, things look strangely deformed.

Here’s one example. Inside the black circle, you can see that my intersection didn’t work very well. Below is another unseemly intersection, where the “thread” hangs inexplicably outside the spool.

I sewed for about 40 years before I figured out how to manage these tricky intersections. I think you’ll like this technique. It’s made life easier for me.

I’m working on these little toy soldiers for a Christmas quilt designed by Lori Holt of Bee in My Bonnet. There’s a tricky intersection where the top of the arm meets the torso. It’s circled below.

I learned this the hard way—on my first block, I didn’t pin or pay much attention, and the top of the arm was weirdly above the torso, as if the soldier had dislocated his shoulder. (No photo because I was mad.)
So I resorted to my little cheat for tricky intersections.
You probably know about “pin matching” already, and that’s the first part of this method.

I’m going to join the arm section with the head-and-torso section, shown above. Below, I’ve placed the pin at the top of the arm and 1/4″ in from the raw edge. This photo is just to show you where the pin will need to come through from the wrong side.

Working from the wrong side, push the pin through at the top of the blue arm patch and 1/4″ in as shown below.

Then push the pin through the torso section, 1/4″ in from the raw edges and right on the seamline between the blue and the white. My pin is pointing to this spot in the photo below.

Keeping the pin upright and in place, carefully nudge the two sections so they are right sides together. This lines up the intersection perfectly as long as the pin remains upright.

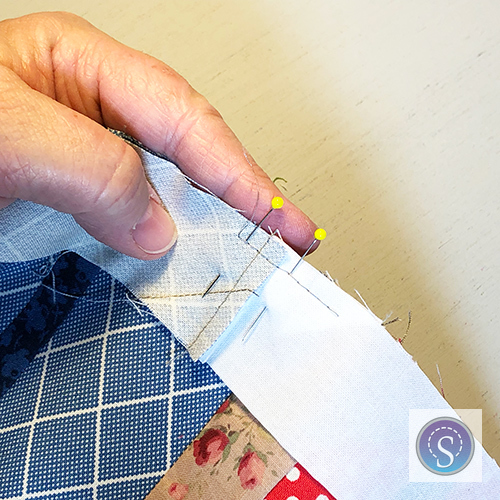
Leaving the first pin standing upright, pin as you normally would through all the layers on each side of the intersection (see the yellow pins below).

Remove the upright pin. Increase the stitch length on your machine to about 4mm. The HQ Stitch 510 can be set as long as 6 mm, but I found 4mm to be about right. Sew the two sections together for only about an inch, starting and stopping outside the yellow pins. Leave the rest of the seam unsewn.
You’ve sewn the tricky part of the seam and you’ve used long stitches so they’ll be easy to remove if need be. Now you get to open the seam and see if you were successful.
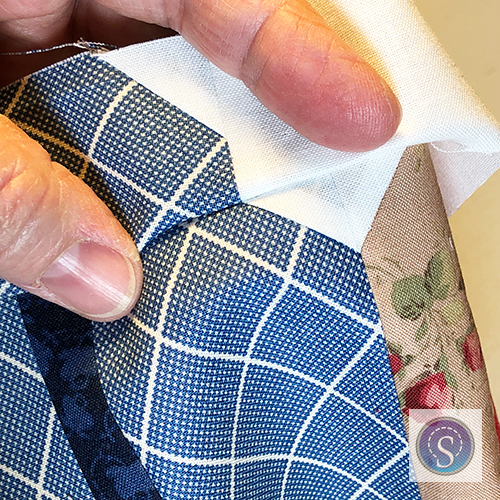
If you pinned correctly, your intersection should be perfect. In case it’s less than perfect, you can easily remove the stitches and try again. But if you’re happy with it, sew the entire seam with a normal stitch length (2mm).
You can use this little trick any time you have a critical intersection that needs to be perfect. Just follow the steps:
- pin match the intersection and leave the pin upright
- pin on each side
- sew a short seam with long [4mm] stitches
- check for accuracy, redo as needed
- sew the entire seam with a normal stitch length [2mm]

Since I started using this trick, my soldiers’ shoulders have been turning out fine.

And my little army is growing.
Find the toy soldier pattern in the book Vintage Christmas by Lori Holt for It’s Sew Emma.
My toy soldiers were pieced on the HQ Stitch 510. Learn more.
Bravo! Thank you ever so much for the much needed trick .