I spent time with two of my great-nieces recently and they made their first quilts. The HQ Stitch 210 turned out to be perfect for a first-time sewing experience. Based on
My nieces are 9 and 12 and they’re delightful little people. They are best buddies, and I think they especially enjoyed doing this project together.
Preparation
I wasn’t sure how much time we’d have or how things would go, and I wasn’t even sure how interested they would be, so I made it up as we went. But I did plan ahead for supplies and I brought these things along on the five-hour drive to their house in Kansas:
- HQ Stitch 210 and Sew Steady extension table
- Instruction manual for the 210 (always a good idea when you travel)
Stack - Basic sewing kit (pins, scissors, thread, etc.)
- Travel iron and wool ironing mat
- Rotary cutter, ruler and mat (didn’t need!)
- Sheets of regular printer paper from my recycle box
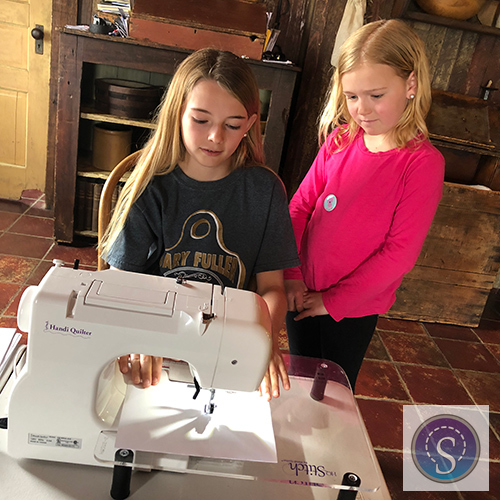
Meet the Sewing Machine!
I unthreaded the machine and showed them how the foot control makes the machine run. I pointed out the needle and explained that it would sew right through a finger!
We located the slide control that slows down the motor so you can sew slowly if you want to, and they listened to the sounds as I ran the machine at different speeds.
Then I had them run the machine without any thread and with nothing under the needle. I wanted them to see that it’s just a tool that you can start and stop whenever you need to.
We discussed keeping our hands safely away from the needle but I also showed them that you can run the machine at full speed and your hands will be completely safe if you stay out of the danger zone, which I declared to be anything in the silver area of the needle plate.
Let’s Sew: Paper
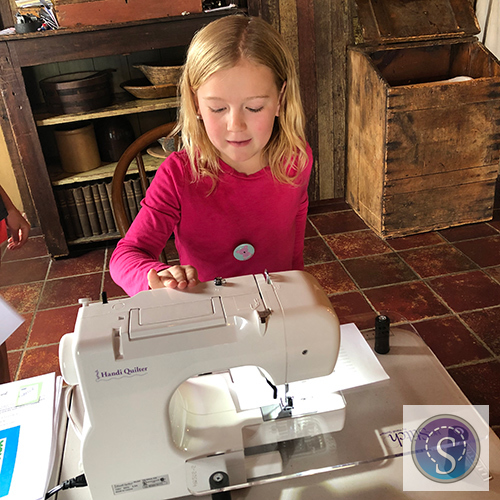
They were anxious to get something under that presser foot! We started with paper and they sewed straight lines several times. They soon remembered to raise and lower the presser foot each time, and before long they didn’t even have to look for it. They were in awe at the straightness of the lines and the uniformity of the little holes. It was great fun to see what interested them the
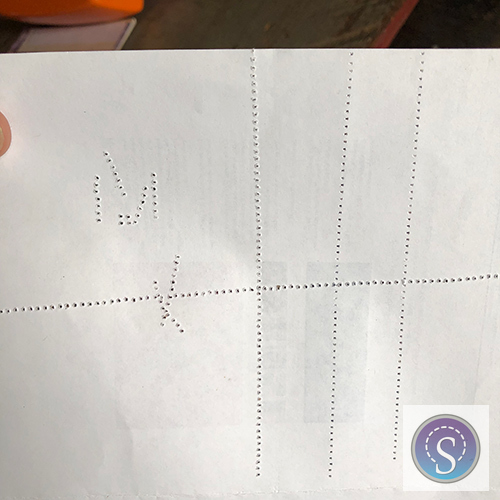
Calla Mae wondered if she could draw letters so I let her try it. She had some success as you can see below!
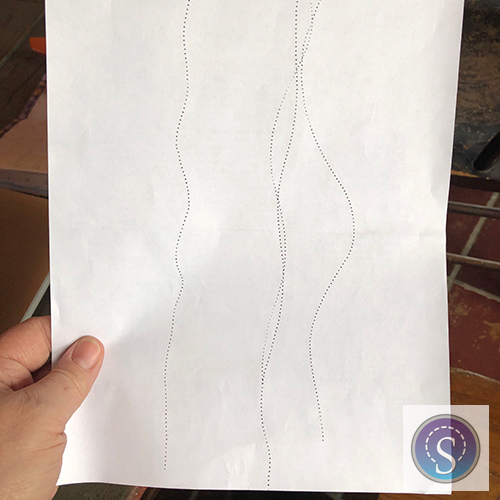
After the straight lines, we gave curvy lines a try. I showed them how to hold the edges of the paper and turn it to control the lines. They were amazed.
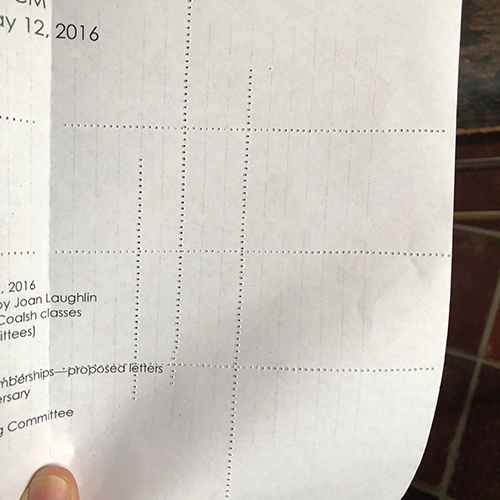
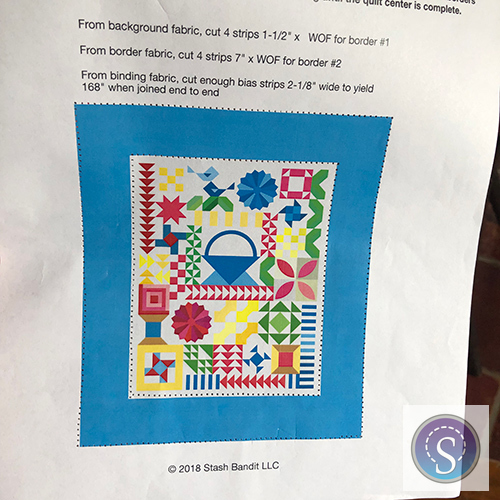
One of the best ideas I had all day came next: They sewed around the edges of a quilt diagram that happened to be in the recycled papers I’d brought along.
This gave me the chance to show them how to use the handwheel to lower the needle, then raise the presser foot and pivot the page.
See how beautifully their needle holes turn most of the corners? Again, they were thrilled by this little trick. It was so much fun for me to see their excitement.
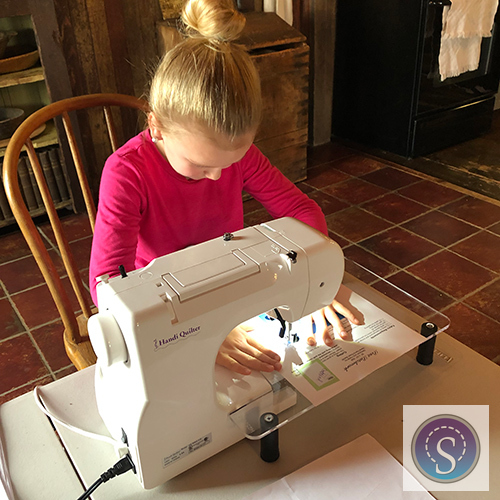
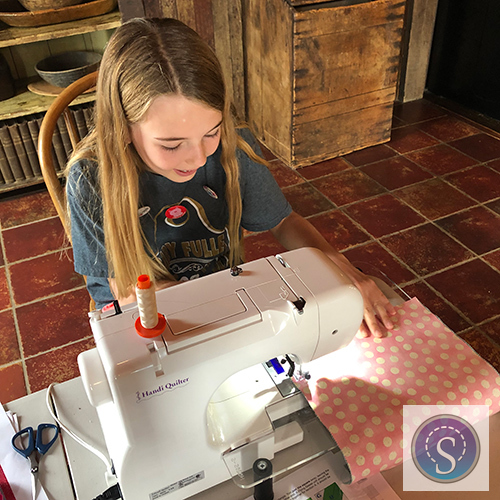
Let’s Sew: Fabric
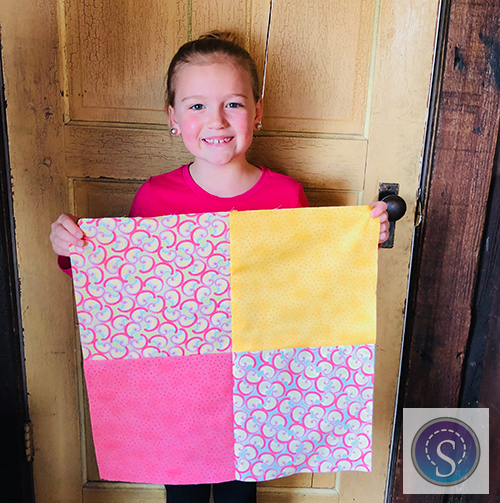
I knew they were ready to take the next step of sewing on fabric. Each girl chose four 10″ squares of fabric. They delighted in thinking about which ones to use and they chattered enthusiastically. The squares were all from one line of fabric so everything coordinated and I knew they couldn’t really make wrong choices. That was a good thing!
They had a great time deciding where each fabric should go. They carefully sewed their squares together in pairs and then sewed the pairs together. They were amazed at how “right sides together” gave them a lovely finished look.
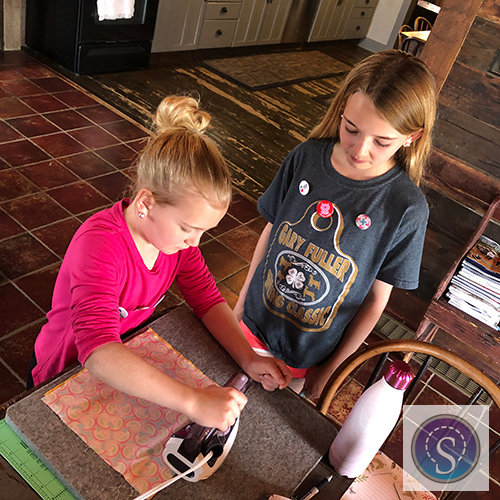
I incorporated pressing as we went along. We learned to set each seam before pressing it to one side. A lightweight travel iron worked well and seemed safer than a full-size steam iron.
A few tricks made the first seams manageable for the girls.
- I doubled up two purple vinyl Sewing Edge strips on the needle plate so there was a hefty lip against which to guide the fabric. One is great for experienced piecers, but two was better for newbies.
- I used a 5/8″ seam allowance instead of the usual 1/4″. I didn’t think a quarter would give them enough wiggle room. It turned out that the Sewing Edge was so effective, they could probably have sewn a quarter-inch seam with no trouble.
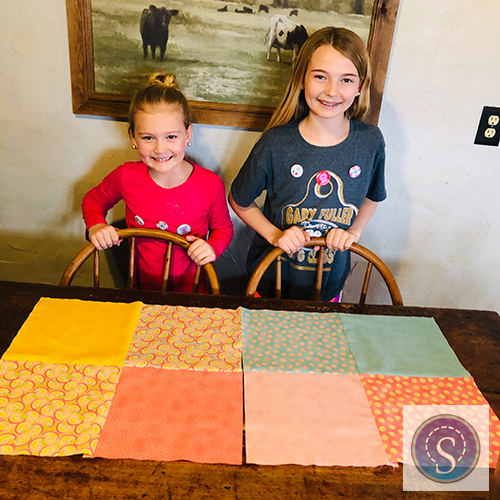
At this point I wanted them to decide how to finish their projects. The choices were a pillow, a doll quilt, a table topper, or a wall quilt. The last three would have identical finishing steps but I wanted Calla and AJ to catch the excitement of having choices as to how their handiwork would be used and displayed. It worked!
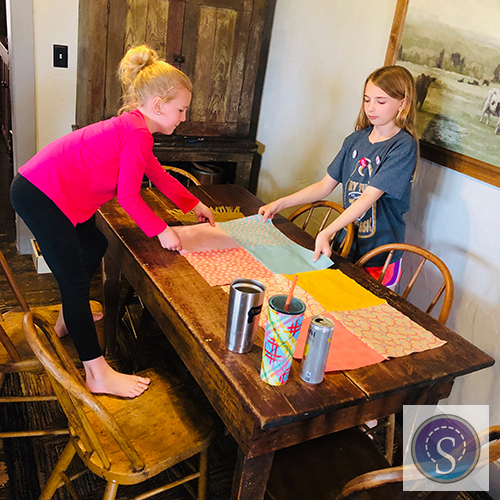
They were so cute as they smoothed the patchwork on the harvest table to consider!
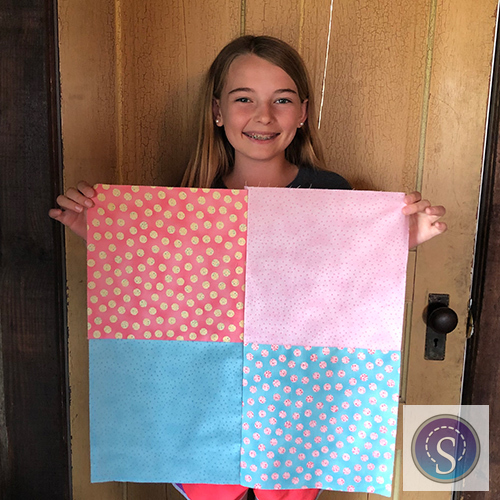
First Quilt: Finished!
I hadn’t thought to bring larger pieces of fabric for backing—honestly, I don’t think I expected we’d get that far. The best option was to choose four more squares and sew them together. It went more quickly the second time and their confidence really grew!
I hadn’t taken batting either, so we made a quick trip to the big box store (they live in a very rural area and it was our only choice) and bought low-loft polyester because it was the only option.
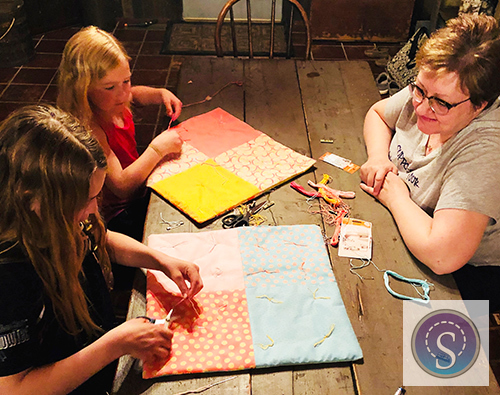
By this time I realized that tying the layers would be better than quilting and would allow us to actually finish that day, so the girls picked out five colors of DMC embroidery floss to go with their fabrics. I got safety pins for basting and big needles, too. And then we joined the layers and batting, turned everything right sides out and had a tying party!
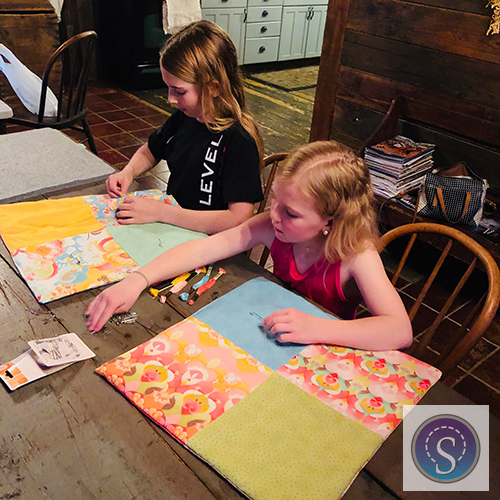
The girls might have enjoyed this most of all. They thought and pondered and considered how many
They both cuddled with their quilts that night, and we took pictures the next day. That’s why the quilts are a little wrinkled below.
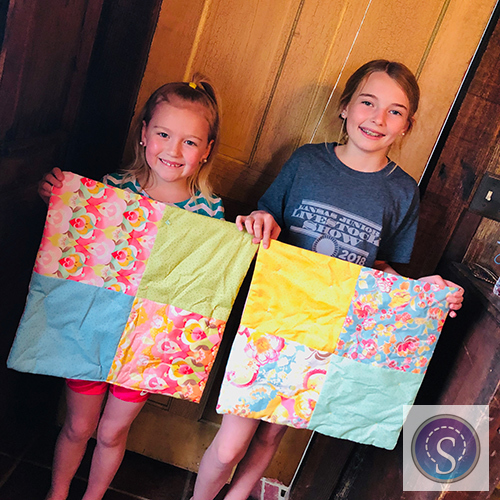
They were so happy and excited, exclaiming, “They’re so pretty!” “They’re gorgeous!” “These are so beautiful!”
And this: “Thank you, Aunt Diane! That was so much fun!”
Leave A Comment