We’ve been talking about the need to adjust the seam allowance when your patchwork isn’t coming out accurately. If you own an HQ Stitch 710, we covered this in an earlier post.
But if you own a different machine, there are two ways to adjust a seam allowance. Many times, my students aren’t aware that there is more than one way to skin this cat.

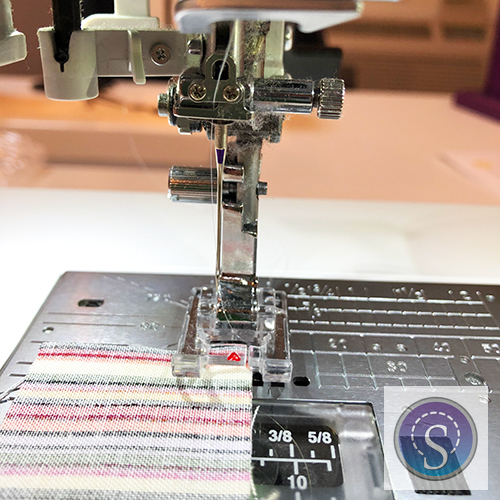
In the photo above, the needle is in the center position. If I want to adjust the seam allowance, the first thing I can do is to
change the needle position.

In the second photo, you can see that I’ve moved the needle to the right. This will result in a smaller seam allowance. Conversely, if you move the needle to the left, the seam allowance will be bigger.
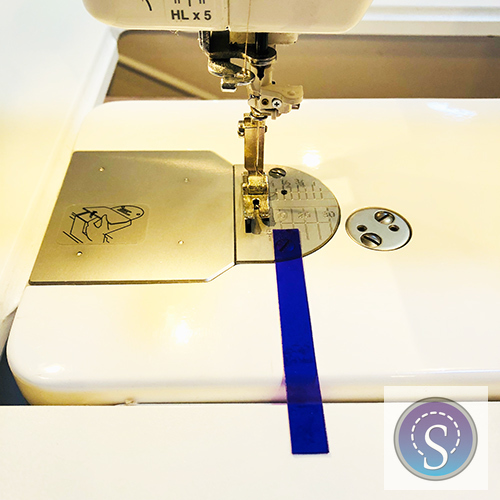
The other thing I can do to adjust my seam allowance is to
move the fabric.
In this photo, I’ve scooted the fabric to the left. Of course, you could also move it to the right to get the seam allowance you need.
When you change the fabric position, it helps to mark your sewing machine bed. One helpful notion is the QTools Sewing Edge. I carry a supply with me, and I usually give two or three away during a class to people who are having trouble with accuracy.
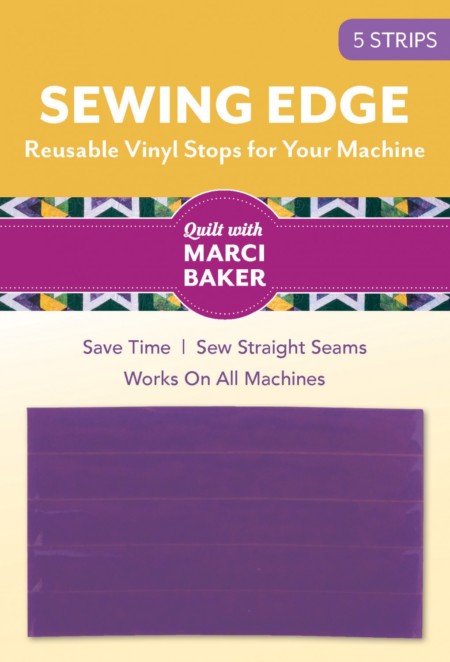
The repositionable vinyl strips create a little ridge for your fabric to butt up against, and they won’t leave a residue on your machine. Widely available, the package of 5 purple strips retails for about $10.
If you’re more of a do-it-yourself quilter, use layers of painter’s tape to create a ridge, or tape an old credit card to your machine bed with painter’s tape.

The beauty of modern sewing machines is that you can change one or both (needle position and fabric position), and then you can tweak them until your patchwork is spot-on.
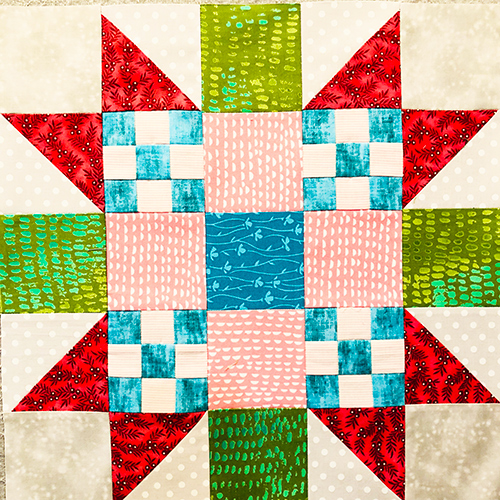
When I started making these scrappy stars recently, I had to adjust the seam allowance so that the Nine Patches fit perfectly with the triangle-squares.
Always test your seam allowance when you start a new project. Sometimes the weight of the fabric, the type of thread, the sewing technique and the sewing machine will mean that adjustments are necessary. And now you know two easy ways to make them!
Leave A Comment