By Diane Harris, HQ Stitch Brand Ambassador
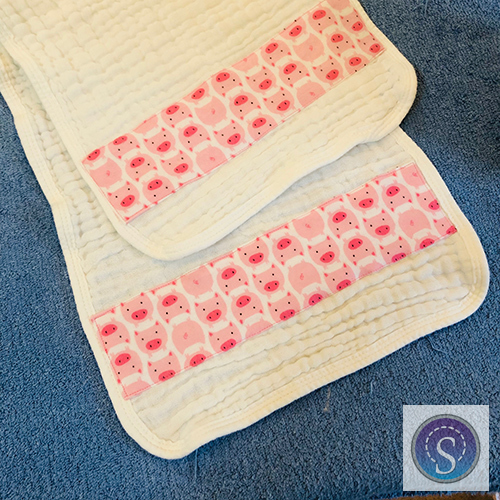
Most of my making is devoted to quilts, but the impending arrival of twin grandbabies has me sewing a few other things this summer. Today I embellished burp cloths with the HQ Stitch 510.
Everyone knows that original cloth diapers make the best burp cloths, and it seems that the retail gods got to work on that. Now you can buy burp cloths made of the same all-cotton muslin as “Curity” diapers used to be. Who can forget the blue word printed on those classics?!

Purchase…
I bought four 10″ x 20″ cloths for under $10 on Amazon. I washed and dried them with a load of towels and they shrunk a little and crinkled up as expected. This is a good time to mention that this is not a project for exacting, meticulous work. This is relaxed, which is good, because let’s face it, babies are going to spit up on these.
My family’s history has a lot of pigs in it. My dad was a nationally known Hampshire breeder—the black ones with a white belt. When I was 17, I was an area Pork Queen, handing out ribbons at the county fair, velvet banner, tiara and all. So naturally I chose pigs on 100% cotton flannel for the embellishing. I washed and dried it with a load of towels, too. A quarter-yard or fat quarter would be plenty for four burp cloths.
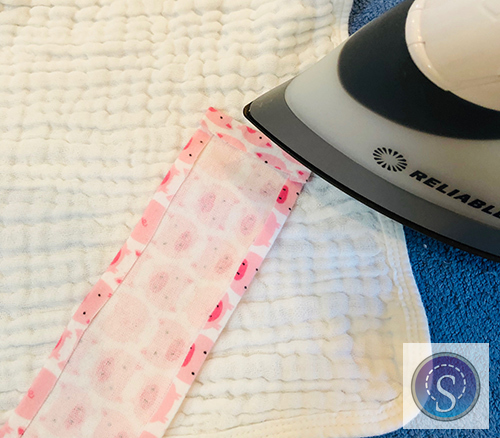
Cut and press…
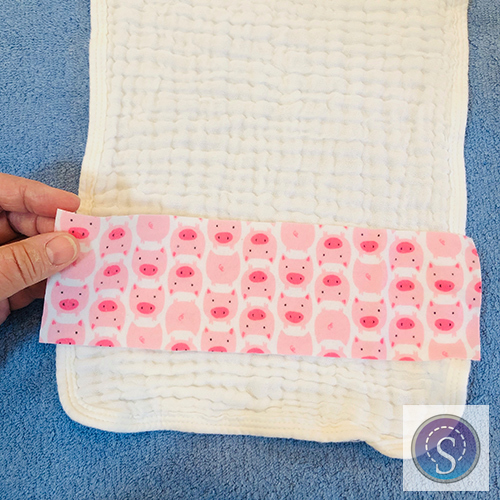
I cut a strip of flannel 3″ wide and about 1/2″ wider than the burp cloth. If your flannel print is directional as mine was, pay attention to the orientation of the motifs when you cut.
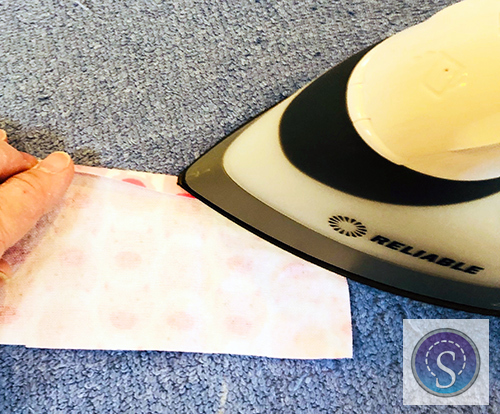
I pressed under about 1/4″ on the long edges of the strip and on one end. Then I laid the strip on the cloth to determine where to press the other end so it fit nicely across.
It doesn’t really matter if you make your strip go all the way across the entire cloth or to just inside the binding, or in the middle of the binding. This is a relaxed project!
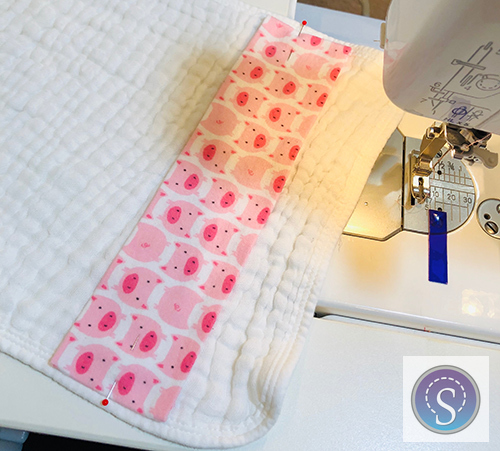
Lay the strip with its edges pressed under on top of the cloth and pin at each end. I left a little under 2″ of burp cloth showing at the bottom. Just eyeball it and put it where you think it looks nice. I didn’t try and flatten out the burp cloth at all. Just leave it crinkly.
Sew…
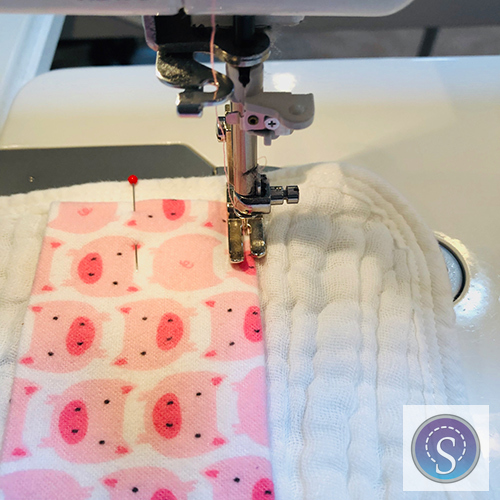
Thread your machine with something that matches the flannel and use white or cream in the bobbin. I used a stitch length of 2.7mm. Activate the needle-down feature. Securing the stitching at the beginning and end, sew close to the edges of the flannel, pivoting at each corner with the needle down.
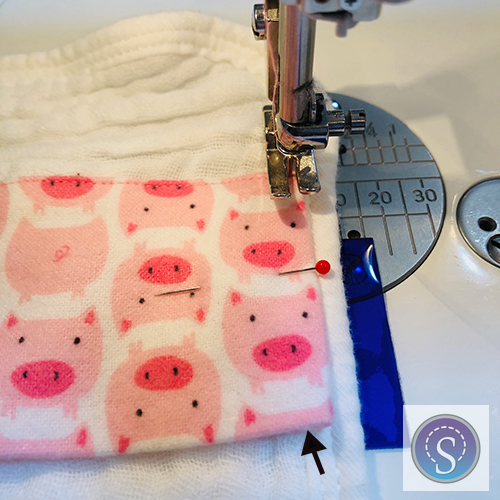
See the black arrow in the photo above? If the flannel edges peek out in that area, just tuck them in a little with an awl or a seam ripper as you approach. I didn’t need to use a walking foot for this task, but if your layers shift too much, that would be something to try. You can also add more pins as needed.
Be sure to secure the stitches at the end by sewing in place or backstitching. Burp cloths will be washed a lot and you want those stitches to last.
Enjoy…
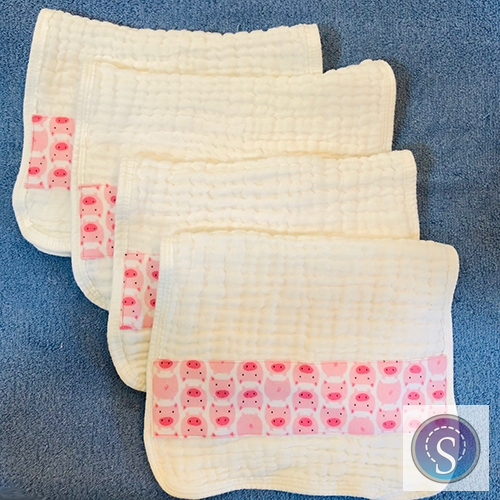
At first I thought I might just do one or two cloths, but I liked them so much that I did all four. It makes my heart happy that these grandbabies will have a small reminder of their great-grandpa every time their little mouths are wiped off, even if they’re too young to know it.
This was a fun, fast and easy little make that took about an hour. It would make a great 4-H project or a first sewing experience for a youngster.
Do you think four burp cloths is enough for two babies?
Your little piggies are so cute and I loved the story about why pigs are a good choice. Being a former Pork Queen is quite a fun memory. Have fun with the new twin grands!